Viewing entries in
"Community Supported Counter Culture"

1 Comment

Perfectly Hard-Cooked Fresh Eggs

Anybody who has ever tried to hard-cook a very fresh egg knows that there's always one problem you come up against - they're impossible to peel!  The albumen (that thin "skin" between the shell and the egg white) wants to stick.  This means that when you go to peel the egg, the shell clings to that albumen for dear life which will make it nearly impossible to remove the shell without removing chunks of egg with it, resulting in a hard-cooked egg that looks like somebody used it for target practice.

Most people will tell you to just use older eggs (about 7 to 10 days) and that's a perfectly good solution to the problem.  But what if you don't want to wait more than a week to cook your eggs?  The solution is simple:  you quick-age your eggs!  All you need to do is store your eggs at room temperature for 24-48 hours.  Boom!  You've got aged eggs. 

If the thought of storing your eggs at room-temperature freaks you out, here's some food for thought...  Most commercially-produced eggs are washed before they get packaged.  Eggs have a natural coating when they come straight from the hen that protects the insides from bacteria, but when the eggs are washed this coating is removed and the eggs are more vulnerable.  Farm-fresh eggs still have this natural armor and can stand up to the elements better than a store-bought egg.  What's more is that if you ever feel unsure, you can immediately tell if your egg has gone bad by the way it behaves when you submerge it in water:  If it sinks, it's fresh, if it stands straight, it's less fresh but still good, and if it floats, throw it out. 


Perfectly Hard-Cooked Fresh Eggs
makes 12

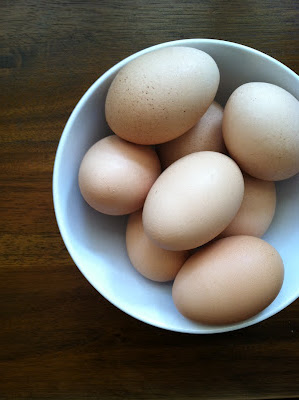
1 dozen farm-fresh eggs, kept at room temperature for at least 1 day
water

Place your eggs in a large pot (large enough so that the eggs aren't over-crowded).  Cover the eggs with water and bring to a boil.  Immediately remove from heat and cover.  Allow eggs to cook for 14-15 minutes.

Meanwhile, fill a clean sink or a large bowl with water and add about 5 cups of ice.  When the eggs are finished cooking, immediately place them in the ice water.  Allow eggs to sit in the ice-water for at least 5 minutes before peeling. 

1 Comment

Comment

Martha's Apple Scones, Colorado-Style

I love Fall.  Have I mentioned that before?  (I know I've mentioned it before).  I love the cool, crisp weather, the vibrant, colorful leaves on all the Aspens, and most of all... the produce!  So, in celebration of the beginning of my favorite season, here's a recipe that features one of my favorite fall fruits - apples.

While apples are really wonderful in their natural state, when you have a lot of them it's nice to incorporate them into recipes!  I had so many apples on hand from my Grant Family Farms CSA fruit share that I decided to track down this wonderful recipe from Martha Stewart.  These scones are moist but still crumbly and just sweet enough to feel like a treat.  The oats lend a little chewy texture and add a heartiness to the scones.  I tripled this recipe, brought 2 batches to Marczyk's to share with my co-workers, and the third batch I threw in a plastic bag and stuck in the freezer.  Pretty good way to get through almost a dozen apples, am I right?

Martha's Apple Scones, Colorado-Style
makes 12 scones

1 2/3 cups all-purpose flour, plus more for rolling
1 1/3 cups old-fashioned rolled oats
1/4 cup light-brown sugar
1 teaspoon ground cinnamon
1/2 teaspoon freshly grated nutmeg
2 teaspoons baking powder
1/2 teaspoon salt
1 1/2 sticks very cold unsalted butter, cut into small cubes
1 1/2 cups diced apple (3 small apples, peeled)
2/3 cup cold buttermilk, plus more for brushing
Raw turbinado sugar (optional)

Heat oven to 400 degrees.  In a large bowl, whisk together the dry ingredients.  Using your fingers or a pastry cutter, break the butter apart until a crumbly texture results and no butter pieces are larger than the size of a pea.  Add apples and buttermilk and mix with a wooden spoon until the dough just comes together.

Lightly dust a clean work surface with flour.  Divide the dough into two equal portions and sprinkle with flour so that the dough won't stick.  Flatten each portion into circles about 1 1/2 inches thick (about the diameter of a salad plate).  Place on a baking sheet lined with parchment paper and, using a knife or a dough scraper, score each circle of dough into six equal wedges.  Brush the tops of the scones with a little buttermilk and generously sprinkle with turbinado sugar.  Bake until just golden, about 25 minutes.  Allow to cool on a wire rack for at least 10 minutes.  Serve warm or room temperature with jam and clotted cream.

Comment

Comment

Zucchini and Pine Nut Olive Oil Cake

Most of us are familiar with zucchini bread, but when it comes to using zucchini in sweet stuff, many people stop there.  Here is something a bit more elegant than zucchini bread but it is so quick and easy to put together that you don't even need to bust out your fancy Kitchenaid standing mixer.  A bowl and a wooden spoon are all you need to make this moist and delicious summer cake that is just as good for a slightly decadent breakfast as it is for a light, Summery and flavorful dessert.


Zucchini and Pine Nut Olive Oil Cake
serves 6

1/2 cup mild olive oil
1 cup sugar
1 egg
1 tsp. vanilla
zest of 1 lemon (about 1 T)
1 medium zucchini, grated (1 cup packed)
1 cup all-purpose flour
1/4 cup cake flour
1/2 tsp. baking powder
1/2 tsp. salt
1/2 cup pine nuts

Heat the oven to 350 and grease an 8" skillet or cake pan with a little extra olive oil.  In a medium bowl, mix oil, sugar, egg, vanilla and lemon zest until smooth.  Add zucchini and mix well.  Sift dry ingredients and add to cake batter.  Mix well to combine.  Stir in the pine nuts and pour batter into skillet or pan.  Bake until cake is set, about 40-45  minutes.  Allow to cool in the pan on a wire rack for at least 10 minutes before slicing.  Serve warm or at room temperature. 

Comment

Comment

Colorado Melon Caprese

It just wouldn't be Summer without a little caprese in my life, but who says you have to make it with tomatoes?  The Italians?  Well, probably...  but I think this version, using some of those sweet, late-summer Colorado melons that are widely available this time of year, is a delicious and beautiful alternative!

This version, pictured, was made as little hors d'oeuvres on lovely metal cocktail skewers (*see note below for skewer directions).  You can also just combine all the ingredients in a big bowl and serve it family style, just don't use all of your oil and balsamic.  I used a marvelous Etnia Spanish olive oil with merquen (a Spanish smoked chile and cumin spice mix) to make this dish more interesting and flavorful, but a basil-infused olive oil, garlic oil, or even just regular olive oil with work fine.


Colorado Melon Caprese

1 medium (or 2 small) heirloom melon, washed
1/2 a lemon, juiced
1 bunch green basil
1 bunch purple basil
1 8-oz. container fresh mozzarella ciliegine (the small, bite-sized balls)
about 1/4 cup olive oil with merquen (or your favorite infused olive oil)
about 1/4 cup white balsamic vinegar
salt and pepper, to taste

Cut the melon in half and scoop out the seeds with a spoon.  Using a melon baller, scoop out little bite-sized balls of melon until no more flesh remains.  Place melon balls in a bowl and gently toss with lemon juice.  Tear the larger basil leaves into small, 1" pieces and leave smaller leaves whole.  Add mozzarella and basil and toss ingredients to mix.  Drizzle with oil and balsamic vinegar and season with salt and pepper, to taste.  Gently toss and serve immediately.

*To assemble skewers:  make individual caprese bites using reusable metal cocktail skewers.  First, spear a melon ball, followed by a purple basil leaf and then a green basil leaf.  Follow with a piece of mozarella, then drizzle each skewer with oil and balsamic and lightly season with salt and pepper, to taste. 

Comment

Comment

Crispy Fingerling Chips

Who doesn't love fingerling potatoes?  They're starchy and filling like a regular potato, but in a cute, rustic-looking little package!  I love them and I don't care who knows it.

While fingerlings are often kept whole and simply roasted, sometimes I like to turn them into homey, crispy, little chips.  These are wonderful served alongside scrambled eggs, as a side dish with any kind of sandwich, or just eaten as a snack by themselves.  The funniest-looking, knobby little potatoes can make for some interesting shapes, so don't just pick the perfect ones!


Crispy Fingerling Chips
makes about 2 cups

1/2 lb. fingerling potatoes, washed and scrubbed
1/4 cup olive oil
salt and pepper, to taste

Heat oven to 400 degrees.  Using a mandoline, slice the potatoes lengthwise so they are thin but still sturdy, about 1/16th of an inch.  In a medium bowl, toss potato slices with olive oil until they are well-coated and arrange in a single layer on 2 large baking sheets. 

Bake chips until the potatoes shrink and start to crisp on the bottom, about 20 minutes.  Remove from oven and flip each slice, then return to the oven and bake until potatoes are golden-brown and crispy all over (smaller slices will take less time than larger ones), about 20 more minutes.  Remove from oven, sprinkle with salt and pepper, to taste, and allow to cool for at least 5 minutes before serving.

Comment